Once you have harvested your deer, the next step is to clean the skull. Make sure to remove any flesh, which could be difficult. Next, apply a whitening agent to the skull, and finally, spray paint it. You can also apply a textured finish to the skull if you wish. Once you have done this, you can hang your deer skull on a wall! Here are some tips to make the process easier.
Remove all the flesh from a deer’s skull
To display a deer skull properly, the flesh should be removed from the deer’s skull. You can do this with tweezers, pliers, or a scalpel. You may also use a screwdriver to make a gap between the jaws. It is important to keep the deer skull clean to avoid bacteria and other harmful elements. Once the flesh is removed, you can clean and polish the skull.
You can also clean a deer’s skull yourself by adding washing soda to water and rinsing it thoroughly. Add 8.5 ounces of washing soda to two gallons of water and allow the skull to soak in for about one to three hours. The water should begin to turn clear, and any loose dirt should be visible. Use gloves and a brush to prevent transferring the dirt to your hands.
After cleaning the skull, you can start the process of boiling it. Make sure that the water is up to half an inch above the base of the antlers. You can also use pliers to remove the tissue from the skull and wait for the water to cool for 30 minutes before proceeding with the cleanup. During the time it takes to boil the skull, you can use high-pressure water to blast it with the air in the nasal cavity.
Clean a deer skull
You might be wondering how to clean a deer skull before hanging it. The first step in cleaning the skull is to remove any tissue. Then, you can use a hydrogen peroxide solution to bleach the skull white. To avoid damaging the bone structure, you should wear gloves when handling bleach and hydrogen peroxide solutions. You may also wish to buy a tank of beetles to get rid of any leftover debris.
The process of cleaning a deer skull has undergone several changes over the years. Some people remove meat, but the most important step is to clean the skull before hanging it. You also need to remove the eyes and ears. A clean skull is easier to dry, and less work is required. In the past, a beetle larva was used to clean a skull. Nowadays, there are safer methods that can be done at home.
Bleaching a deer skull is a simple process that involves soaking the skull in a hydrogen peroxide solution. This procedure allows you to preserve the natural antler color while removing dirt and bacteria. While this method is fast and affordable, the process can result in the deterioration of the bone. In addition, it also creates a powder from lost calcium. But hydrogen peroxide is more expensive.
Apply a whitening agent to a deer skull
You can bleach a deer skull by immersing it in a solution containing water or peroxide bleach. While both methods work equally well, the first one is easier and more environmentally friendly. The second method takes longer than the first, but it is safe to use and may result in a brighter white skull. However, there are several important things to keep in mind before applying a whitening agent to a deer skull.
First of all, you must wear protective clothing while applying a whitening agent to a deer skull. You should wear gloves, a face mask, a sleeveless shirt, and eye protection. A pot large enough to hold the entire skull should also be used. You can then begin bleaching. Once the deer skull has a whiter hue, you can apply a shiny polyurethane coating.
You can also apply liquid peroxide to a deer skull or antlers. Activated peroxide will activate once it comes into contact with a hotter bone, allowing it to penetrate the bone more effectively and faster. To ensure an even whiter finish, soak the skull in hot water for at least five minutes. You can then carefully remove the skull from the container, rinse it with clean water and let it dry.
Spray paint a deer skull
You can paint a deer skull for cheap. You can find spray enamel paint at big box stores or home improvement centers. Before you begin, prepare a big tub with water. You can use this to dip your deer skull, making sure to get one that’s large enough not to compromise the antlers. Dip the skull into the paint, swirling it around gently. Once you’ve painted the first coat, you’re ready to begin the process of painting the rest of the skull.
The next step is to prepare the skull for the spray painting process. First, mix one part hydrogen peroxide and one part water. You should dip the deer skull into the solution, not the antlers. After the skull is soaked in the mixture, make sure to spray from several angles to make sure the paint doesn’t flake. If you find that the paint has already flaked, repeat the process.
Next, you’ll need to select a base color. You can use one color or several. The first layer of paint should be light brown or black. Once this is complete, you’ll need to choose a second color to accent the first. For a brighter, more vibrant color, you can use metallic or neon paints. For an earthy color, choose a lighter shade of brown and use a light brown or red base.
Remove the eyes before boiling a deer skull
Before boiling a deer skull, remove the eyes and flesh. You may wish to clean the skull thoroughly before you boil it to avoid grease from entering the bone. Also, remove any eye sockets, as the skull can become incredibly difficult to clean once the eyes are removed. You can also use a wire hook to remove the brain. However, remember that it’s not an easy process. If you don’t want to waste any time, here are a few simple steps you can follow to get the brain out of a deer skull.
Before boiling a deer skull, remove the eyes. The lower jaw extends at an angle toward the eye socket. Ideally, you’d want to remove it, but if not, you should cut off the jaw muscles and force the mouth open. Once you’ve done this, you’ll need two quarts of hydrogen peroxide and scalding water to clean the skull.
After the deer skull is clean and ready for cooking, you can carefully remove the meat from it. This process may take an hour or more, so be sure to plan ahead. If you’re not ready to wait that long, you can even freeze the skull until the simmering process is complete. Make sure to drain the water from the skull after it has simmered for a few hours. A fresh skull is easier to clean than a dried one.
Boiling a deer skull can cause teeth to fall out
If you want to boil a deer skull for a meal, there are several important steps you must take before starting the process. To avoid losing teeth, cut out the tongue, cheeks, and eyes before beginning. The skull is much easier to clean when the meat has already been removed. Also, don’t forget to use nitrile gloves to avoid getting animal matter on your hands.
First, clean the deer skull of all meat and hide. Remove eyeballs and any larger pieces of meat. Remove the lower jaw as well, but it will slip back into place later. Then, boil the deer skull for several hours, scraping off any loose meat along the way. Once the skull is free of meat, add a whitening agent. Then, wait several hours before displaying the skull.
Next, remove the brain. The brain is 60% fat and can stain the skull if it isn’t carefully removed. Make sure to swirl the brain vigorously, or you’ll turn the skull to mush. Then, remove the rest of the flesh by using the tip of a screwdriver or a hole saw. This will allow you to remove the brain easily.
Find the right spot to hang a deer skull
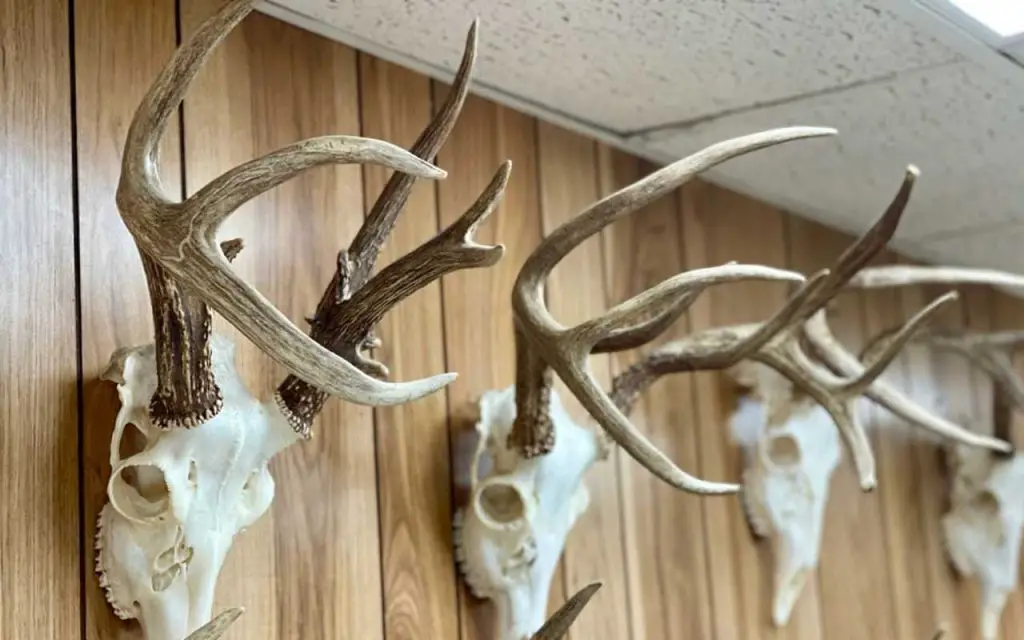
If you’re not a huge hunter, a deer skull can be a beautiful and unique wall decor. Before hanging it, however, you should find a well-ventilated area away from direct sunlight. This way, the deer skull won’t be damaged by the sunlight. Depending on the size of the deer skull, it may need to be adjusted slightly, so it doesn’t stick out too far.
The right spot for your deer skull mount will depend on the size and the location of the studs. A deer skull mounted on a wall is usually hung through the occipital foramen. If you don’t have a wall stud, you can try hanging it on a desk instead. The skull may not sit upright. In either case, you need a stud-finding tool to determine the exact placement of the studs.
Once you’ve decided on the spot, you’ll need to mount the skull carefully. Make sure that it’s level and secure. Also, make sure that it’s tightened and isn’t going to fall off the wall. Then, you can show off your deer skull to friends and family, post photos on social media, and tag the taxidermist. If you want to hang a deer skull on your wall, you’ll need to find the right place in your home to hang it.